How to regenerate MP3 files in Text To Speech Pro?
If you need to update or edit the content of a post in Text to Speech Pro, and you want the MP3 file to reflect these changes, you’ll need to manually regenerate the MP3 file. Follow the steps below to accomplish this:
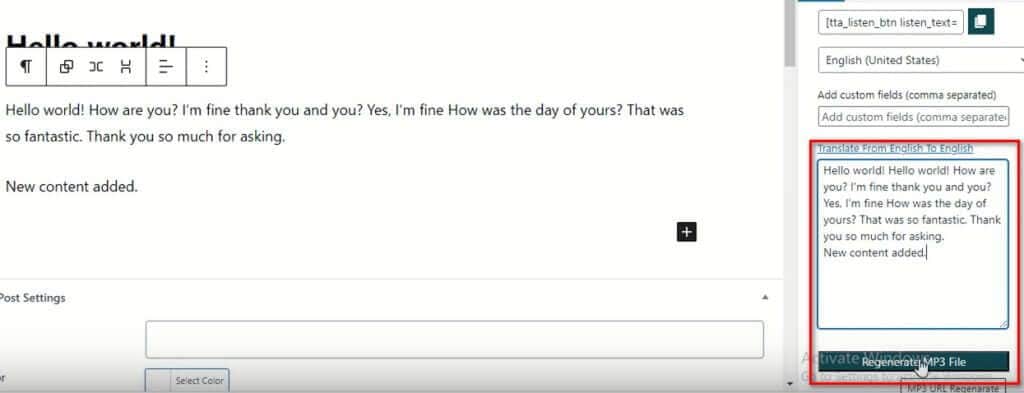
- Edit the Post Content:
- Suppose you’ve published a post, and later you decide to edit its content. After making the necessary changes, proceed to save the updated content.
- Navigate to the Edit Page:
- Once you’ve updated the post content, navigate to the edit page of the post where you made the changes.
- Paste New Content:
- If you’ve added new content, copy the entire updated content and paste it into the appropriate section of the edit page. Make sure to include any new text you want in the MP3 file.
- Click on “Regenerate MP3 file” Button:
- Look for the “Regenerate MP3 file” button on the edit page. This button allows you to regenerate the MP3 file associated with the post.
- Click on the “Regenerate MP3 file” button.
- Confirm Regeneration:
- Upon clicking the “Regenerate MP3 file” button, you’ll likely be prompted to confirm that you want to regenerate the MP3 file.
- Confirm the action to proceed with regenerating the MP3 file.
- Verify MP3 Generation:
- After confirming, the system will regenerate the MP3 file based on the updated content.
- Verify that the MP3 file has been regenerated successfully.
- Playback Verification:
- To ensure that the new MP3 file reflects the changes accurately, play the regenerated MP3 file. Verify that it includes the updated content as expected.
Please note:
- The “Regenerate MP3” option is available only if the Text to Speech Pro feature is enabled, particularly if it utilizes Google TTS Pro.