As more users browse the web on the go, while multitasking, or with accessibility needs, websites need to adapt. One major way to do that is by adding text to speech functionality. This feature turns written content into audio, making your site more inclusive and user-friendly.
Whether you’re running a blog, a business site, or an e-learning platform, adding voice support can significantly improve engagement and widen your audience reach. The best part? You don’t need to know how to code or build complex scripts.
In this guide, you’ll learn how to add text to speech in website using simple tools that work right out of the box, no developer required.
Let’s break it down step by step.
Why Add Text to Speech in Website?
Before we start the setup of text to speech in website, you should also be aware of how much it actually matters to add text to speech.
Not just for accessibility, but for engagement, SEO, and overall user experience. Such as:
Improve Accessibility and Reach
Text to speech makes your content more inclusive by supporting users with visual impairments, reading difficulties, or limited English proficiency. It also caters to people who prefer listening over reading, expanding your reach across diverse audiences.
Boost Engagement and Time on Page
When users can listen instead of read, they’re more likely to stay longer on your site. It encourages passive browsing, improves content consumption, and can even help reduce bounce rates all of which contribute to better SEO performance.
Align with Web Accessibility Standards
Standards like WCAG and regulations such as the ADA emphasize the importance of accessible content. Offering a text to speech feature shows your site is user-focused, legally aware, and future-ready a plus for both compliance and brand trust.
How to Add Text to Speech in WordPress?
There are many text-to-speech plugins available for WordPress, but Atlasvoice stands out as one of the best text-to-speech WordPress plugin.
You can easily install it on your WordPress website and let your readers listen to the content.
The success of your website is greatly dependent on accessibility and user experience. By turning written text into a natural-sounding voice, text-to-speech gives your visitors an easy-to-use and pleasant experience while adding a whole new level to content consumption.
Atlasvoice can help with this. With the help of this WordPress plugin, you can quickly and simply add a text-to-speech capability to your website using this well-known AI-based audio publishing platform.
Having said that, let’s take a step-by-step look at how to quickly and simply use the plugin to integrate text-to-speech in WordPress.
First, download the plugin by visiting atlasaidev.com

There, you will be able to try the free version and you can download it.
However, the button will take you over to the WordPress plugin repository page and you can download the plugin directly from there.

After downloading the free version, you can install it on your WordPress website like other normal plugins you install and use.
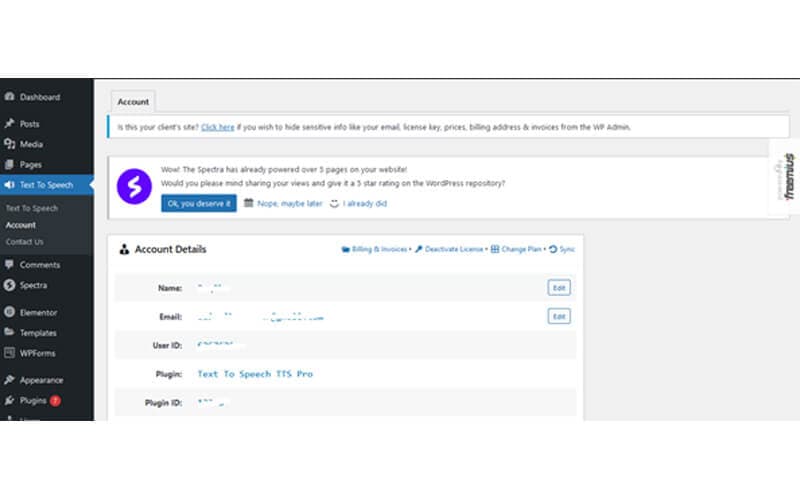
After installing successfully you need a create an account.
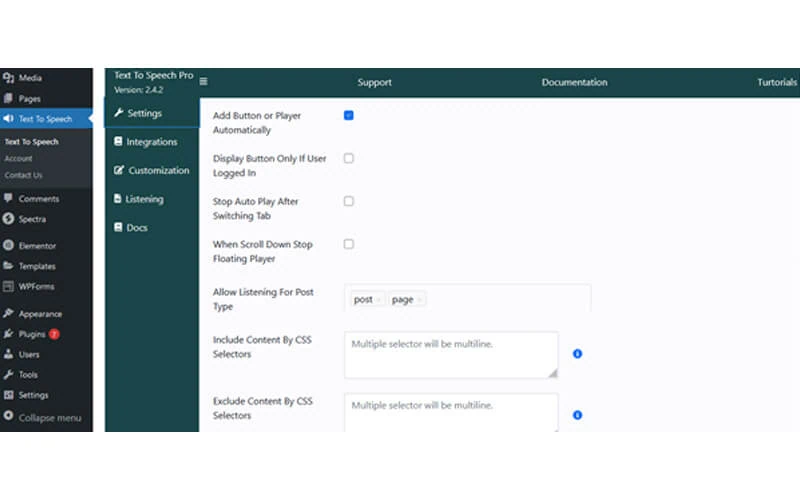
Now click on Text to Speech and there you can add custom settings like which pages or any particular post you want to add the TTS feature.
After completing this section, you can visit any post page or any page to listen to audio.
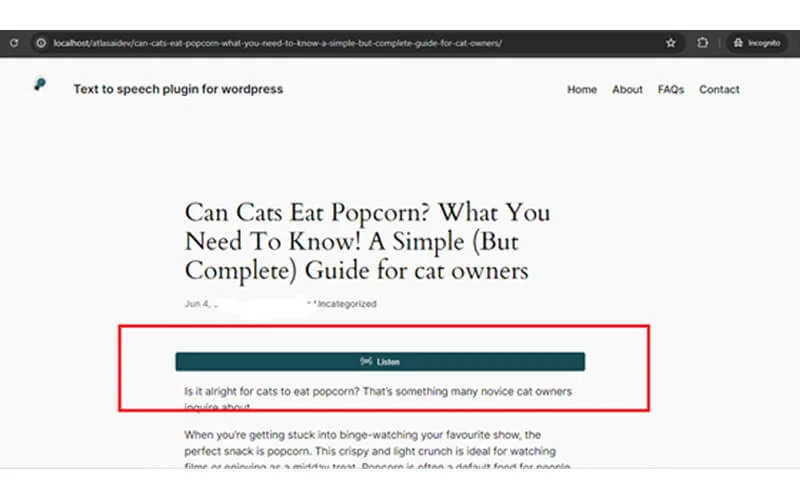
Here if you click on the Listen button then you will be listening.
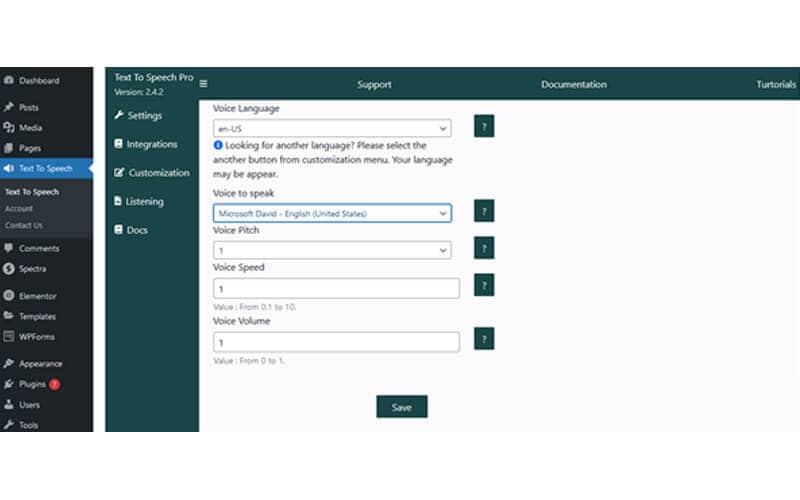
However, In the listening option, you can set up custom settings and change voice language.
The plugin will function immediately after activation and add the voice search icon to your particular page or post form automatically.
How To Add Text to Speech on a Web Page
A web browser can use the Web Speech JavaScript API to enable Text-to-Speech functionality. Therefore, you can use this useful API—that is, its SpeechSynthesis interface—if you want to add text-to-speech capability to a text-heavy web page so that your readers can listen to the material.
For more details visit: https://developer.mozilla.org/en-US/docs/Web/API/Web_Speech_API
Initial Code and Support Inspecting
To get started, let’s make a webpage with three buttons and a sample text that I want to have read out.
Html code:
<div class=buttons>
<button id=play></button>
<button id=pause></button>
<button id=stop></button>
</div>
<article> <html lang=”en”>
<head>
<meta charset=”UTF-8″>
<meta name=”viewport” content=”width=device-width, initial-scale=1.0″>
<title>Rabindranath Tagore</title>
</head>
<body>
<h1>Rabindranath Tagore</h1>
<p>Rabindranath Tagore (born May 7, 1861, Calcutta [now Kolkata], India—died August 7, 1941, Calcutta) was a Bengali poet, short-story writer, song composer, playwright, essayist, and painter who introduced new prose and verse forms and the use of colloquial language into Bengali literature, thereby freeing it from traditional models based on classical Sanskrit. He was highly influential in introducing Indian culture to the West and vice versa, and he is generally regarded as the outstanding creative artist of early 20th-century India. In 1913 he became the first non-European to receive the Nobel Prize for Literature.</p>
<p>The son of the religious reformer Debendranath Tagore, he early began to write verses, and, after incomplete studies in England in the late 1870s, he returned to India. There he published several books of poetry in the 1880s and completed <em>Manasi</em> (1890), a collection that marks the maturing of his genius. It contains some of his best-known poems, including many in verse forms new to Bengali, as well as some social and political satire that was critical of his fellow Bengalis.</p>
</body>
</html>
The narration will be controlled by the buttons. It is now important to confirm whether the SpeechSynthesis interface is supported by the UA. To do this, we employ JavaScript to swiftly determine if the window object possesses the ‘speechSynthesis’ attribute.
Javascript:
onload = function() {
if (‘speechSynthesis’ in window) {
/* speech synthesis supported */
}
else {
/* speech synthesis not supported */
}
}
The first thing we do, if speechsynthesis is accessible, is create a reference for it and assign it to the synth variable. For the three buttons (Play, Pause, and Stop), we also establish references and click event handlers. We also begin a flag with the false value, the purpose of which will become clear later in the article.
Thus, (onClickPlay(), onClickPause(), and onClickStop()) will all be triggered anytime a user hits one of the buttons.
Here is the javascript code:
if (‘speechSynthesis’ in window){
var synth = speechSynthesis;
var flag = false;
/* references to the buttons */
var playEle = document.querySelector(‘#play’);
var pauseEle = document.querySelector(‘#pause’);
var stopEle = document.querySelector(‘#stop’);
/* click event handlers for the buttons */
playEle.addEventListener(‘click’, onClickPlay);
pauseEle.addEventListener(‘click’, onClickPause);
stopEle.addEventListener(‘click’, onClickStop);
function onClickPlay() {
}
function onClickPause() {
}
function onClickStop() {
}
}
Create Custom Functions
Let’s now develop the click functionality for each of the three buttons that the event handlers will press.
Play/Resume Button
We first examine the flag when we press the Play button. When the flag is false, we set it to true, preventing the code within the first if condition from running until the flag is false once more. This way, if the button is clicked later.
Next, we establish a new instance of the SpeechSynthesisUtterance interface, which contains speech-related data like as the speech’s language, speed, pitch, and loudness as well as the text that has to be read. We assign the article text to the utterance variable and add it as a constructor argument.
Javascript code:
function onClickPlay() {
if(!flag){
flag = true;
utterance = new SpeechSynthesisUtterance(
document.querySelector(‘article’).textContent);
utterance.voice = synth.getVoices()[0];
utterance.onend = function(){
flag = false;
};
synth.speak(utterance);
}
if(synth.paused) { /* unpause/resume narration */
synth.resume();
}
}
To choose a voice for the speech from the voices on the user’s device, use the getVoices() function. We use the utterance to assign the first accessible device voice since this function returns an array of all the voice possibilities in a device. synth = voice.obtainVoices()[0]; expression.
When the speech is over, the event handler indicated by the end property is called. Within it, we set the flag variable’s value back to false so that, upon another button press, the speech-starting function may be triggered.
Next, we execute the SpeechSynthesis.speak() function to begin the narration. Additionally, we use the read-only SpeechSynthesis.paused property to see if the narration is paused. If the narration is pausing, we have to use the SpeechSynthesis.resume() function to restart the narration when the button is clicked.
Pause
Let’s now develop the onClickPause() function, whereby we initially verify if the narration is still playing and hasn’t been halted. The SpeechSynthesis.speaking and SpeechSynthesis.paused features allow us to test these scenarios. Our onClickPause() code pauses the voice by using the SpeechSynthesis.pause() method if both criteria are fulfilled.
Javascript:
function onClickPause() {
if(synth.speaking && !synth.paused){ /* pause narration */
synth.pause();
}
}
Stop
The onClickPause() and onClickStop() functions are built the same. In case the speech is in progress, we terminate it by invoking the SpeechSynthesis.cancel() function, which eliminates every utterance.
Javascript function:
function onClickStop() {
if(synth.speaking){ /* stop narration */
/* for safari */
flag = false;
synth.cancel();
}
}
Keep in mind that one event is automatically triggered upon speech cancellation, and we had previously included the flag reset code in it. We reset the flag in the onClickStop() method because there is a flaw in the Safari browser that prevents this event from happening. If you would rather not support Safari, you do not need to do so.
For All Browser Support
The voice synthesis API is supported in full or in part by the most recent versions of all current browsers. Webkit browsers have several bugs, including the inability to play voice from multiple tabs, erratic stopping that occasionally occurs, and speech that is not reset upon page reloading.
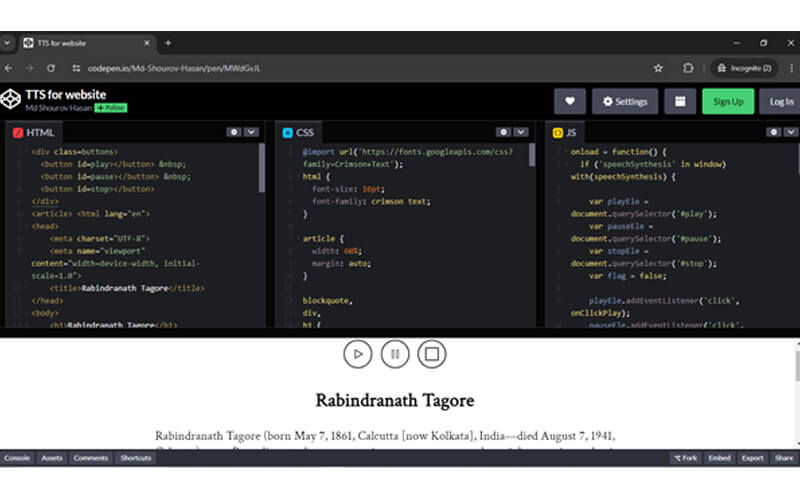
For the final result, you can visit codepen. Here is the link: https://codepen.io/Md-Shourov-Hasan/pen/MWdGvJL.
How to Add Text-to-Speech on HTML Page?
To add text-to-speech functionality to an HTML page, you can use the Web Speech API. Here is a simple example:
Html code:
<!DOCTYPE html>
<html lang=”en”>
<head>
<meta charset=”UTF-8″>
<meta name=”viewport” content=”width=device-width, initial-scale=1.0″>
<title>Text to Speech</title>
</head>
<body>
<textarea id=”text” rows=”10″ cols=”30″>Enter text here…</textarea><br>
<button onclick=”speak()”>Speak</button>
<script src=”text-to-speech.js”></script>
</body>
</html>
And Javascript function:
function speak() {
var text = document.getElementById(‘text’).value;
var speech = new SpeechSynthesisUtterance(text);
window.speechSynthesis.speak(speech);
}
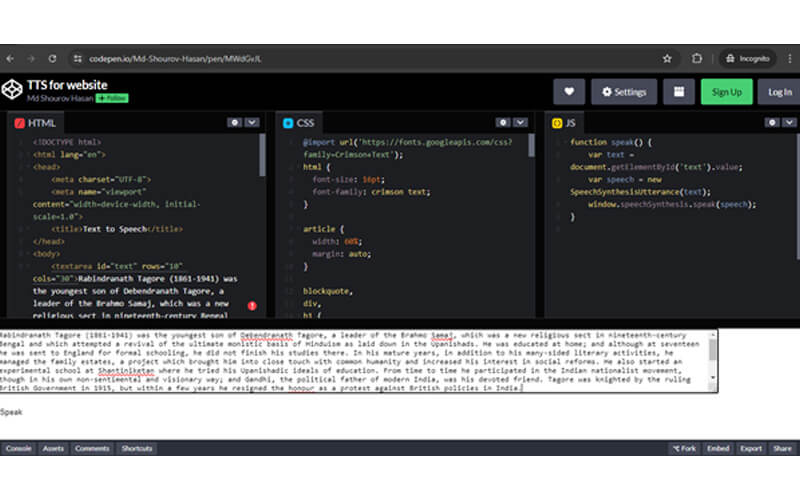
Here is the screenshot from Codepen:
FAQs
You may use plugins like Atlasvoice to give a WordPress website text-to-speech features. All you need to do is install the plugin, register, and then adjust the settings to make text-to-speech available on specific pages or posts.
Web browsers can integrate text-to-speech and speech recognition functions thanks to the Web Speech JavaScript API. Developers may allow text information on webpages to be read aloud by browsers by utilizing the SpeechSynthesis interface.
Using the Web Speech API, text-to-speech may be added to an HTML page without any problem. In HTML, create a text and a button. When the button is pressed, use JavaScript’s SpeechSynthesisUtterance to read aloud the text typed in the text area.
The Web Speech API is supported by the majority of current browsers; nevertheless, Webkit browsers may have some problems, such as inconsistent halting and non-resetting speech upon page reload. For best results, it’s critical to test the functionality in several browsers.
Conclusion
Integrating text to speech in website is a powerful way to boost accessibility and enhance the overall user experience. Whether you’re using a WordPress plugin like Atlasvoice or implementing the Web Speech API for static HTML pages, the setup is easier than ever.
Both developers and site owners can take advantage of these tools to make content more engaging, inclusive, and easier to consume, helping their websites stand out and grow.
Hopefully, this guide has helped you understand how to add text to speech to your website with confidence.
🔊 Stay Updated with AtlasVoice
Get the latest tips on text-to-speech, accessibility, and WordPress delivered to your inbox.
No spam. Unsubscribe anytime.